【Nutanix ログほいほい】Nutanix 各ページへの入口ページと各ページのデザインを決める
この記事は Nutanix Advent Calendar 2023 の12月2日分として執筆しました。
ここまで仕事の合間に時間をかけながらちょこちょこと作ってきた「ログほいほい」
ブログ以外にも今までに Nutanix Meetup でも、ログほいほいについてお話してきました
アカウント作ってログインしていただけますと、過去のアーカイブ観ることができます
Nutanix .NEXT on Tour Tokyo の会場で行われ
42:00ごろから何でログほいほいを作ったのかを語ってます
nutanix.connpass.com
Meetup 大阪での現地会場より 1:19:00ごろから開発の上での苦労話を語っています
nutanix.connpass.com
いずれもログほいほい以外のセッションもとても楽しくマニアックなセッションがありますので、ぜひみてみましょう!
さて、ここでのブログ上の 「Nutanix ログほいほい」 も完成させていかねばなりません!
というわけで今回で一旦、見た目部分を作り上げたいと思います(まだ完成ではない)
今日のコードはコチラ
起動方法も記載しています
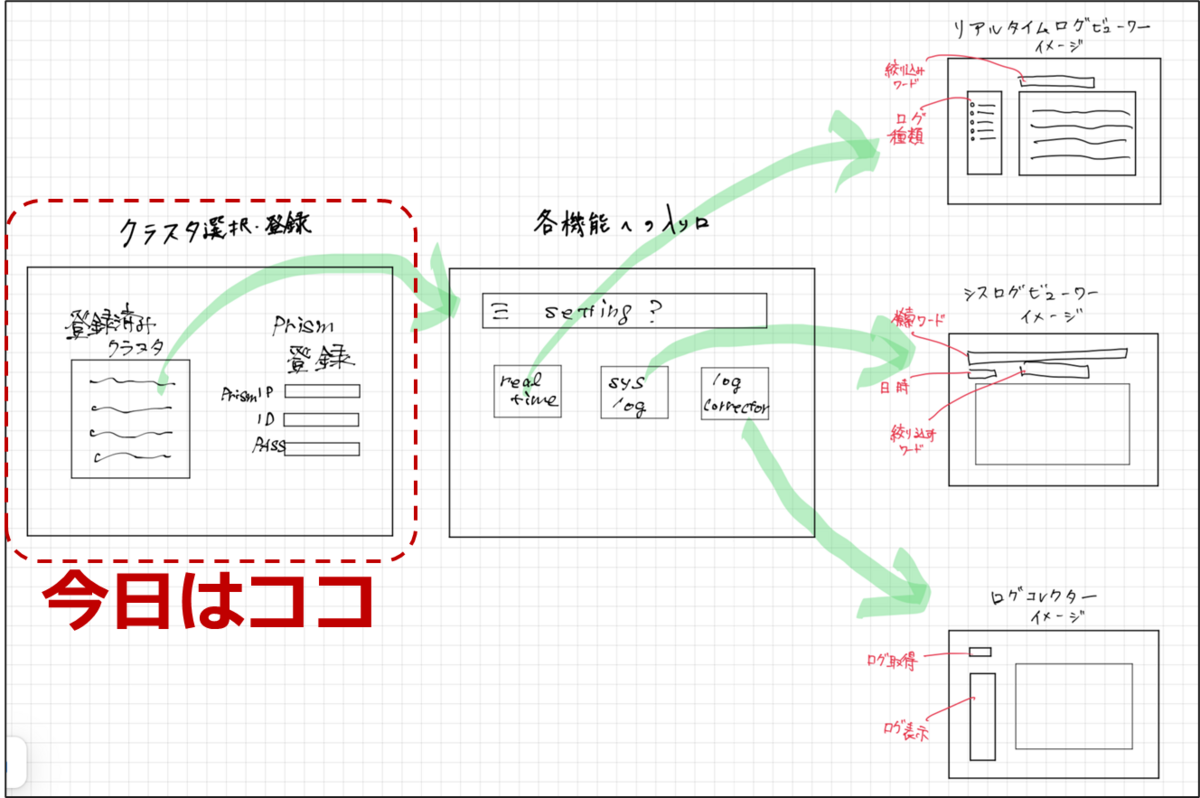
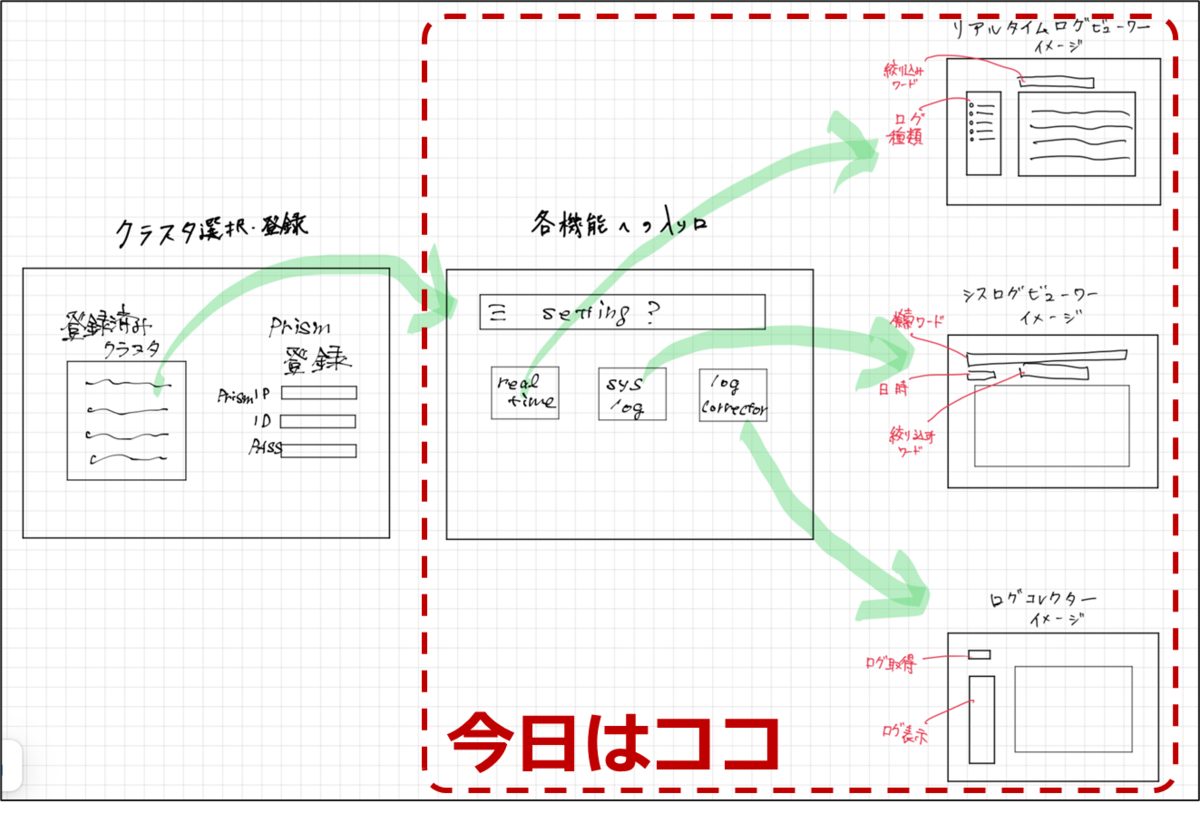
それぞれのページのご紹介
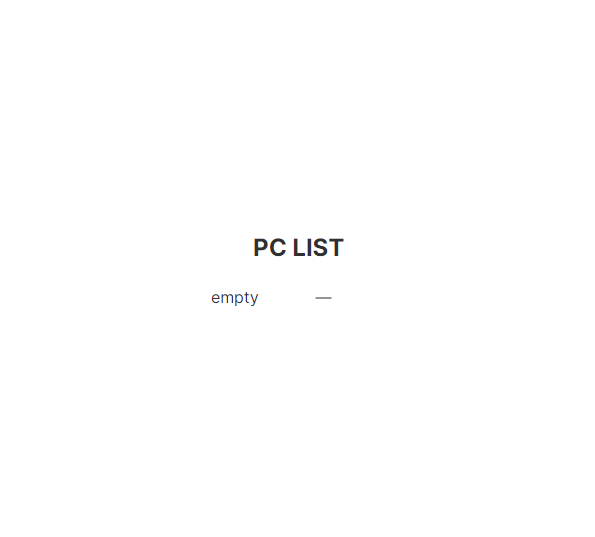
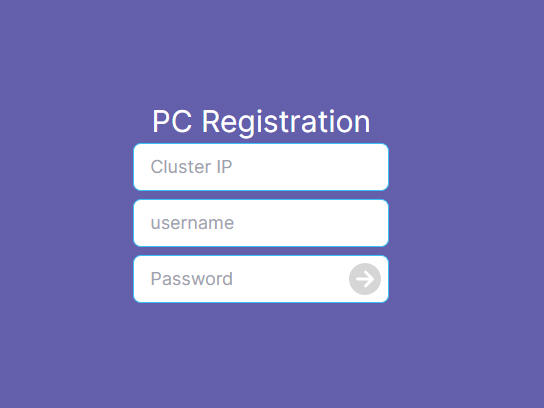
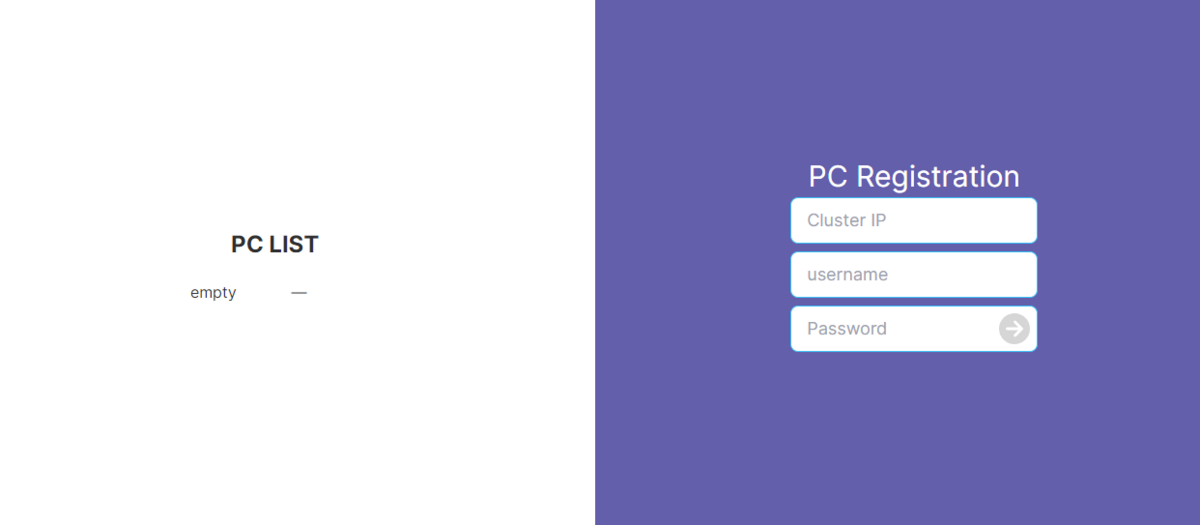
まずは前回まで作っていた、Prism Central登録ページ
登録されたPCを選択することで次のページへ遷移
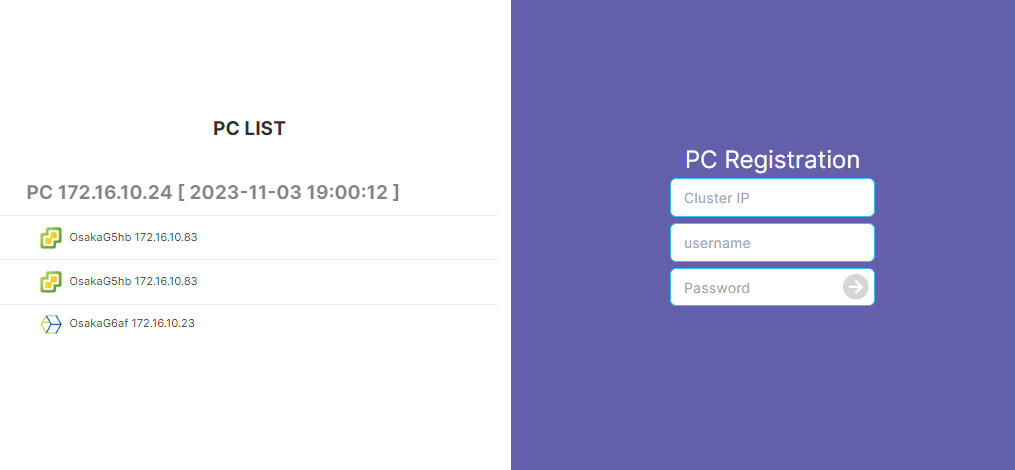
ここではPCに登録されているクラスタを選択します

クラスタを選択後にそれぞれのコンテンツメニューがでてきます

リアルタイムログ
ログの種類を選んで tail -f する感じになります

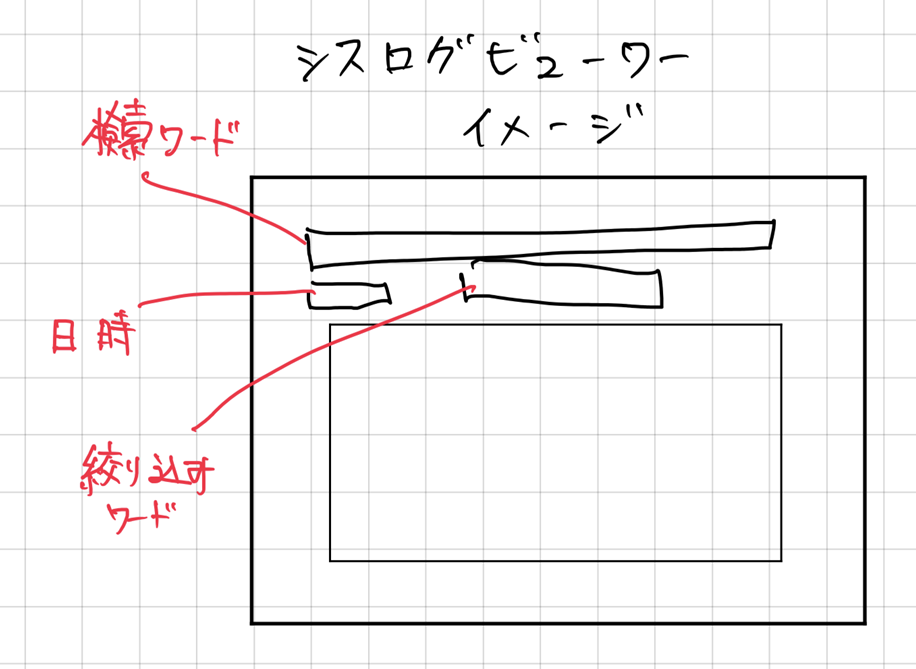
シスログ
Elastic内のログを検索すために、時間範囲の指定と検索ワード、検索結果を更にフィルタさせます

コレクトログ
ログを収集し、収集したログをダウンロードしなくても表示できるように
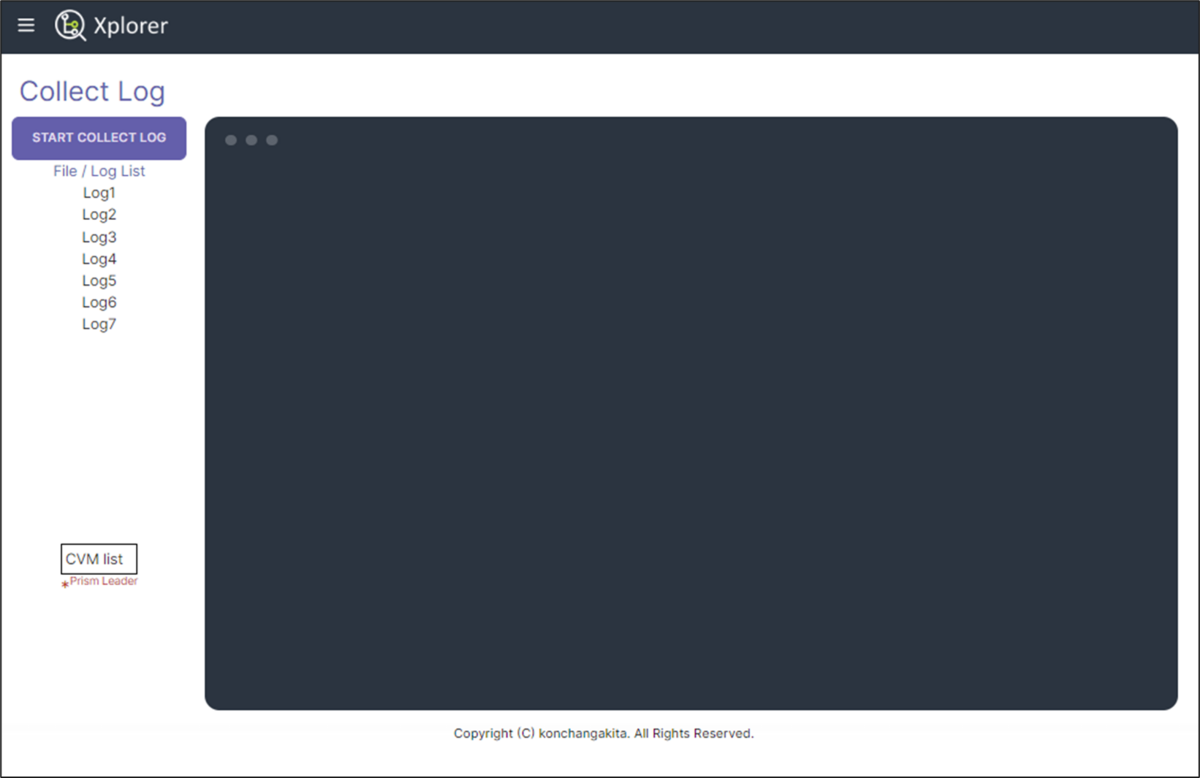
ここまで一旦ハリボテ状態ですが、ここに色々バックエンド側を仕込んで実際にログの表示をさせるように作り込んでいきます
【Nutanix ログほいほい】Nutanixクラスタ登録ページを作る
【Nutanix ログほいほい】バックエンド(Elasticsearchも)のベースコンテナ作る
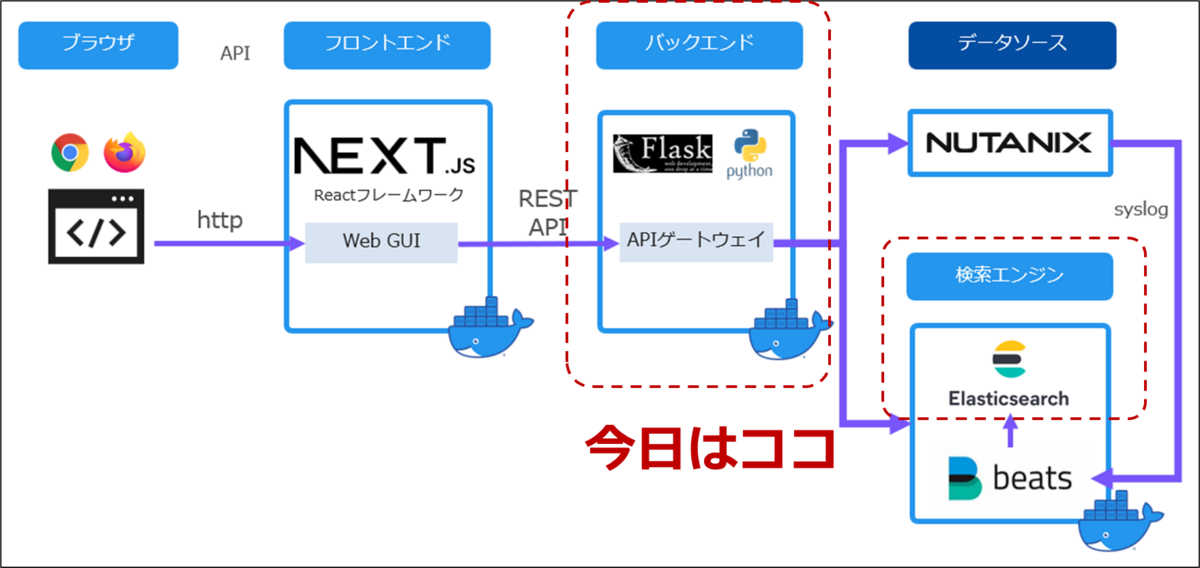
フロントエンドはJava Scriptフレームワークの Next.jsをベースに作りました
バックエンド側は FlaskをAPIゲートウェイ的にたてて、Pythonでデータのやりとりの中心として作っていきます
開発環境全体像
Githubリポジトリ
GitHub - konchangakita/blog-loghoi: Nutanix log hoihoi
今日のブログ分は最終形態は blog/0821配下で
Docker Compose で起動してやると挙動を確認できます
# docker-compose -f "docker-compose.yml" up -d --build
バックエンドコンテナをつくる
Dockerhub の Python Official image をベースに必要なモジュール追加していきます
black:python用コードフォーマッター
elastic:Elasticsearch用
flask:FlaskでAPIゲートウェイとする
jupyter:ちょっとしたPythonコード確認用
paramiko:CVM へ ssh する用
requests:Prism REST API する用
こんな感じの requirements.txt を準備
black==23.7.0
elastic-transport==8.4.0
elasticsearch==8.9.0
Flask==2.3.2
Flask-Cors==4.0.0
Flask-SocketIO==5.3.5
jupyter-events==0.7.0
jupyter-lsp==2.2.0
jupyter_client==8.3.0
jupyter_core==5.3.1
jupyter_server==2.7.1
jupyter_server_terminals==0.4.4
jupyterlab==4.0.5
jupyterlab-pygments==0.2.2
jupyterlab_server==2.24.0
paramiko==3.3.1
requests==2.31.0
開発中のコンテナはこんな感じで
FROM python:3.11.4-slim

RUN apt-get update -y
RUN apt-get install -y curl
RUN apt-get install -y ssh-client
RUN pip install -U pip

WORKDIR /tmp
COPY ./requirements.txt .
RUN pip install -r requirements.txt

#CMD ["tail", "-f", "/dev/null"]

#WORKDIR /usr/src/flaskr
#CMD ["python", "app.py"]
今回もリアルタイムでコードを書きながら開発していきたいので、docker-compose.ymlファイルで、ローカルファイルシステムをマウントしておきます
version: "3.8"
services:
  backend:
    build:
      context: ./backend
      dockerfile: dockerfile
    container_name: loghoi-backend
    ports:
      - 7776:7776
    volumes:
      - ./backend/flaskr:/usr/src/flaskr:z
    command:
      bash -c "cd /usr/src/flaskr
      && tail -f /dev/null"
    working_dir: /usr/src/flaskr
    networks:
      - local

  frontend:
    build:
      context: ./frontend
      dockerfile: dockerfile
    container_name: loghoi-frontend
    ports:
      - 7777:7777
    volumes:
      - ./frontend/next-app:/usr/src/next-app:z
    command:
      bash -c "cd /usr/src/next-app/loghoi
      && yarn
      && tail -f /dev/null"
    working_dir: /usr/src/next-app/loghoi
    networks:
      - local

networks:
  local:
    driver: bridge
Flaskで初期設定
最小構成はこれだけでよいはず
./flaskr
    ├── app.py
    ├── static
    │   └── style.css
    └── templates
        └── index.html
まずは動作確認の為、シンプルに Webサーバたててみます
適当に style.cssを作って、 index.html を呼び出すだけの簡単な app.py を作ります
app.py
from flask import Flask
from flask import render_template

app = Flask(__name__)

# Just for GUI
@app.route("/")
def index():
    return render_template("index.html")

if __name__ == "__main__":
    app.run(host="0.0.0.0", port=7776, debug=True)
Flask の起動
# python app.py
 * Serving Flask app 'app'
 * Debug mode: on
WARNING: This is a development server. Do not use it in a production deployment. Use a production WSGI server instead.
 * Running on all addresses (0.0.0.0)
 * Running on http://127.0.0.1:7776
 Press CTRL+C to quit
 * Restarting with stat
 * Debugger is active!
 * Debugger PIN: 963-107-412
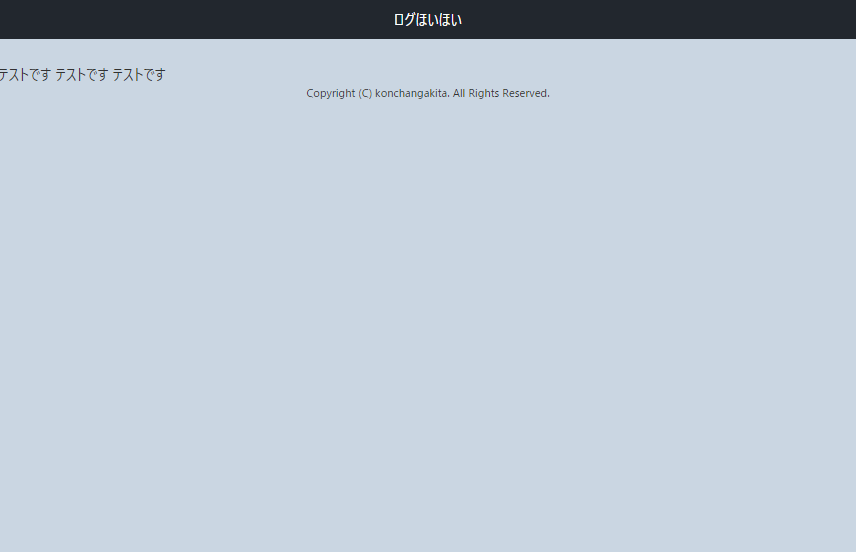
ブラウザにてhttp://開発サーバIP:7776/へアクセス
Flask で REST APIする
フロントエンドからのHTTPリクエストに応じてデータを返す REST API サーバを作ります
URI と メソッド(GET, POST など)の組み合わせで、Python内の関数を呼び出します
GET用, POST用の関数を作る
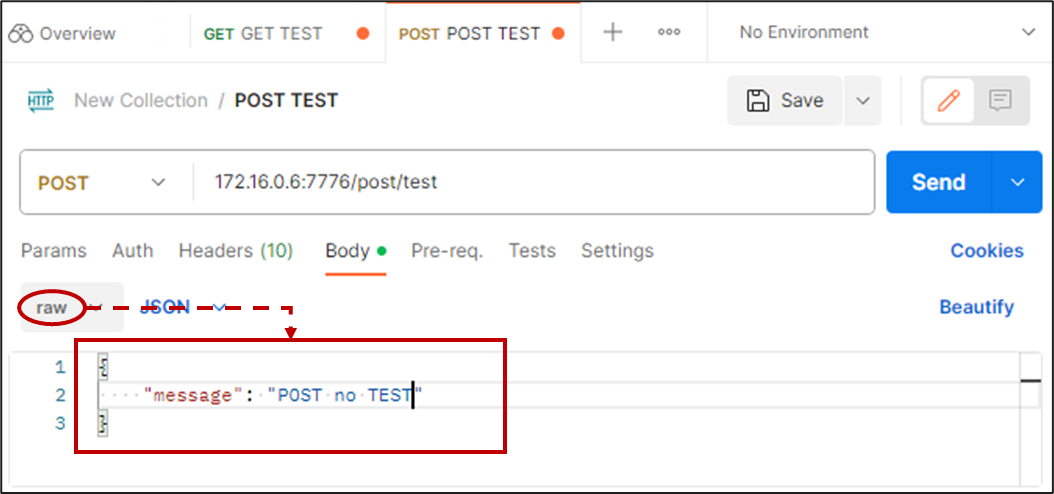
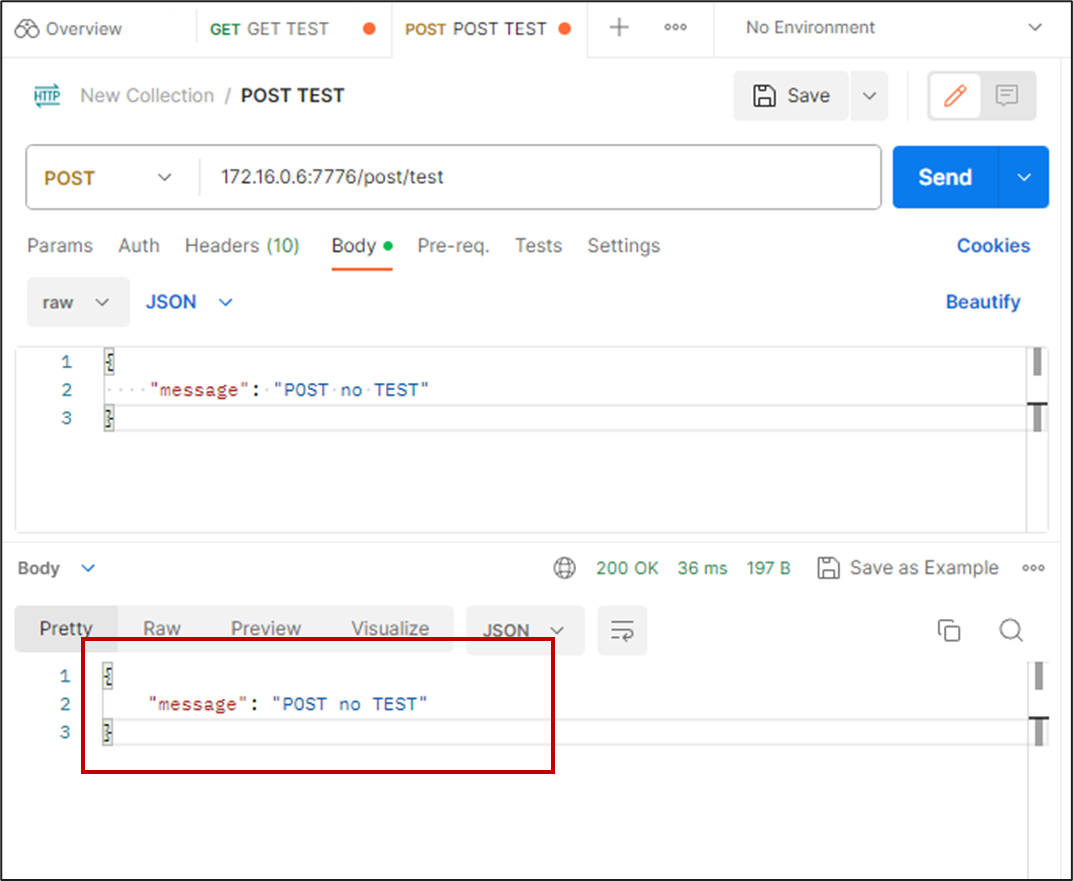
GET /get/test、POST /post/testそれぞれでテキストを返す簡単な関数です
from flask import Flask
from flask import render_template
from flask import request
from flask import make_response, jsonify

app = Flask(__name__)

# Just for GUI
@app.route("/")
def index():
    return render_template("index.html")

# Rest API Test GET
@app.route("/get/test", methods=["GET"])
def get_test():
    data = 'GET saremashita'
    print(">>>>> response: ", data)
    return make_response(jsonify(data))

# Rest API Test POST
@app.route("/post/test", methods=["POST"])
def post_test():
    data = request.json
    print(">>>>> POST sareta: ", data)
    return make_response(jsonify(data))


if __name__ == "__main__":
    app.run(host="0.0.0.0", port=7776, debug=True)
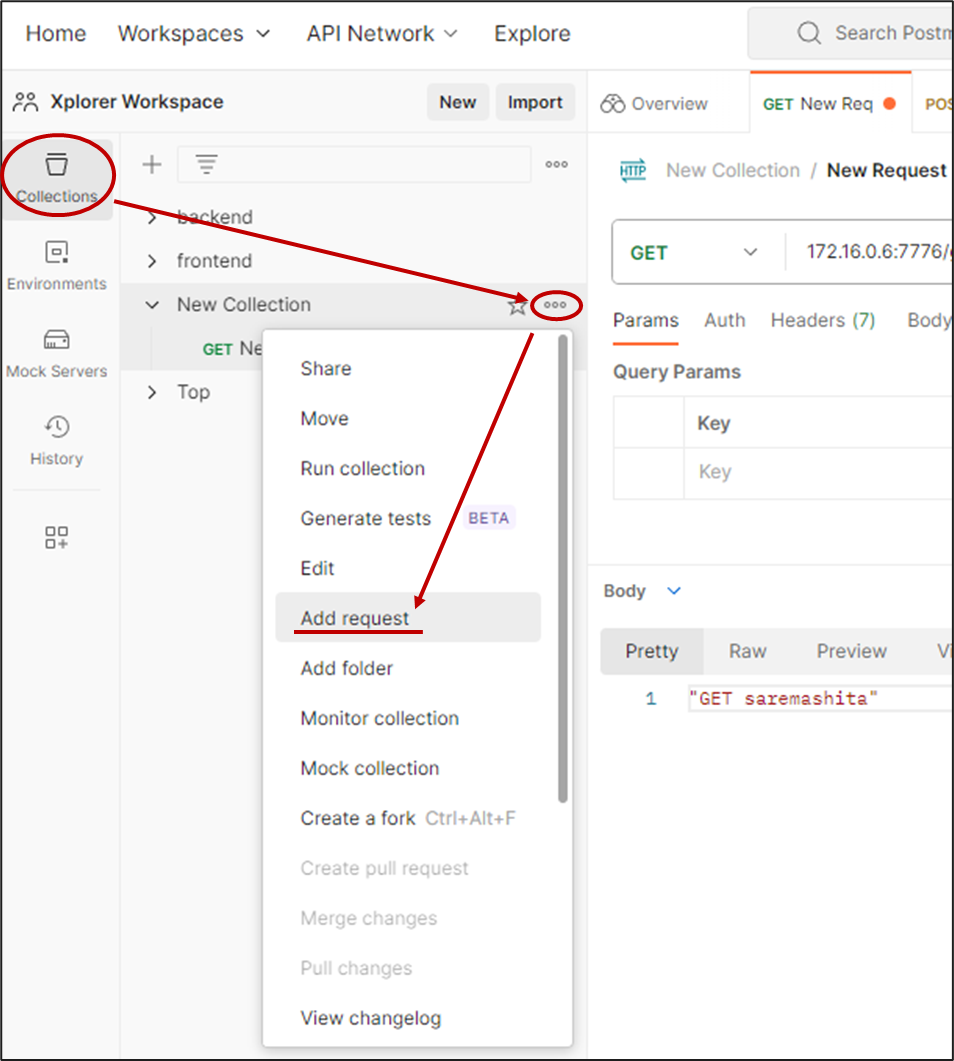
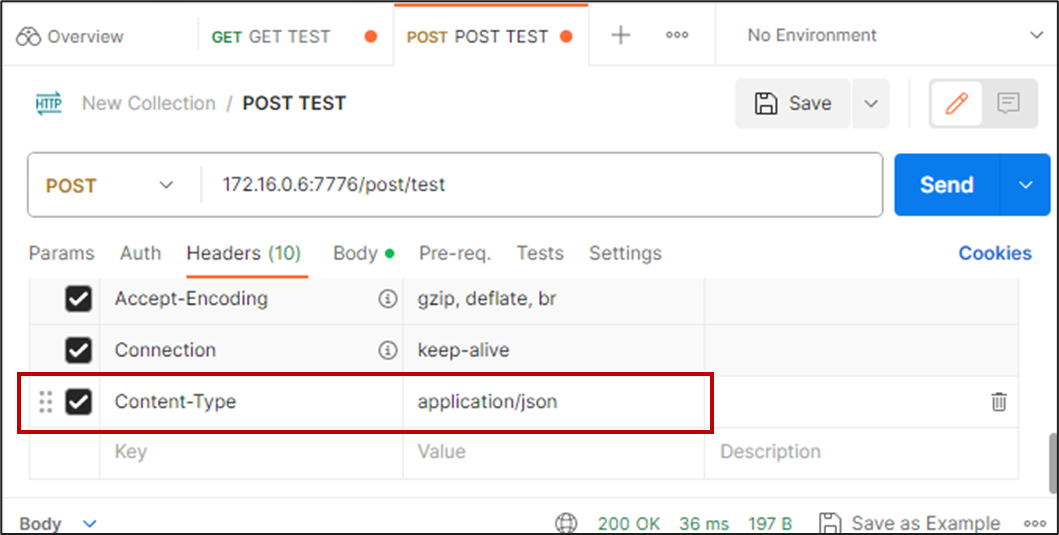
REST APIのテストには、Postmanを使います
ブラウザ版を使うには、「Postman Agent」をインストールしておきましょう
Postman Agent: For Mac, Windows, & Linux
Elasticsearchとの連携
docker-compose.ymlに elasticsearch と kibana コンテナを追記します
(ゼロから作る場合は、「./elastic/es-data/node/.gitkeep」 を作っておきましょう)
version: "3.8"
services:
  elasticsearch:
    image: elasticsearch:7.17.9
    container_name: elasticsearch
    environment:
      - discovery.type=single-node
    ports:
      - 9200:9200
      - 9300:9300
    ulimits:
      memlock:
        soft: -1
        hard: -1
    volumes:
      - ./elastic/es-data:/usr/share/elasticsearch/data:z
    networks:
      - local

  kibana:
    image: kibana:7.17.9
    container_name: kibana
    ports:
      - 5601:5601
    ulimits:
      memlock:
        soft: -1
        hard: -1
    networks:
      - local

  backend:
    build:
      context: ./backend
      dockerfile: dockerfile
    container_name: loghoi-backend
    ports:
      - 7776:7776
    volumes:
      - ./backend/flaskr:/usr/src/flaskr:z
    command:
      bash -c "cd /usr/src/flaskr
      && tail -f /dev/null"
    working_dir: /usr/src/flaskr
    networks:
      - local

  frontend:
    build:
      context: ./frontend
      dockerfile: dockerfile
    container_name: loghoi-frontend
    ports:
      - 7777:7777
    volumes:
      - ./frontend/next-app:/usr/src/next-app:z
    command:
      bash -c "cd /usr/src/next-app/loghoi
      && yarn
      && tail -f /dev/null"
    working_dir: /usr/src/next-app/loghoi
    networks:
      - local

networks:
  local:
    driver: bridge
REST API して Elasticsearch とやりとり
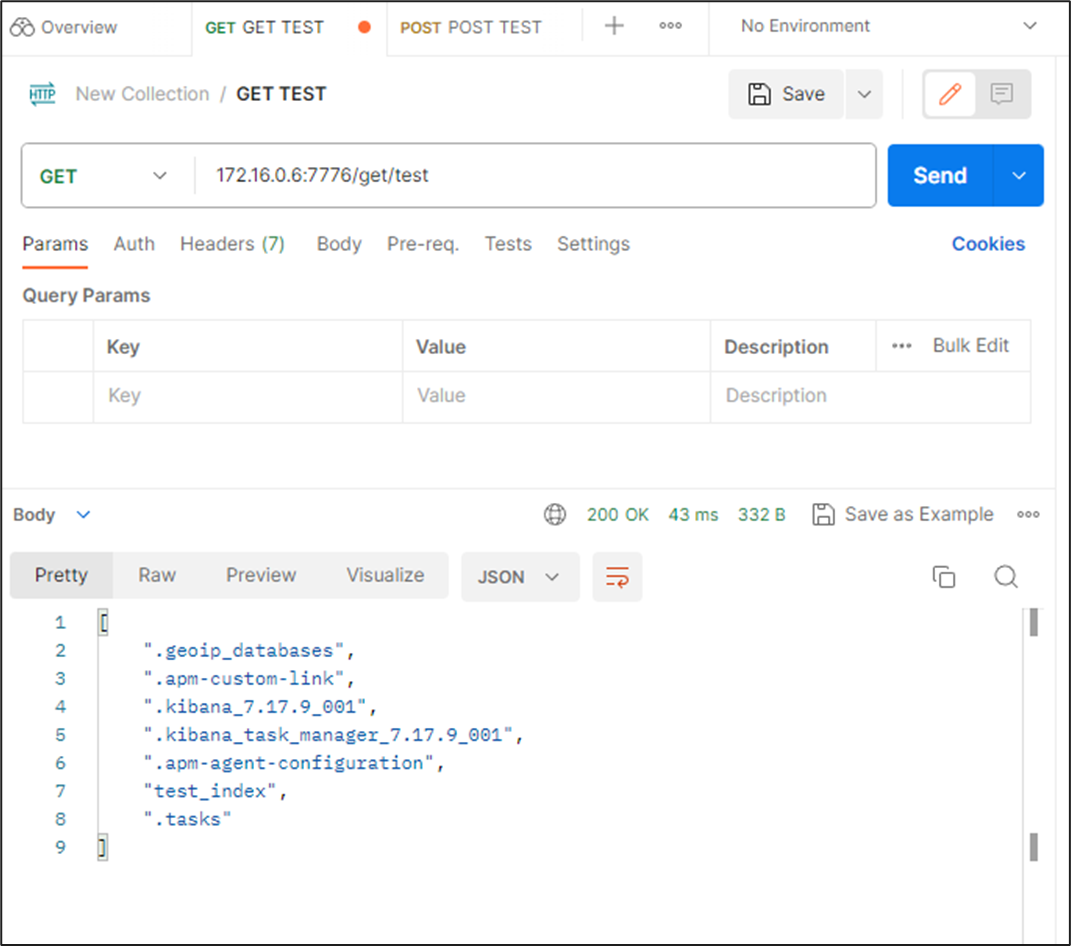
GET で Elasticsearch の インデックス一覧を返し
POST で インデックス名を送ると存在しなければ、インデックスを作る
というのを作ってみます
app.py
from flask import Flask
from flask import render_template
from flask import request
from flask import make_response, jsonify

from elasticsearch import Elasticsearch

ELASTIC_SERVER = "http://elasticsearch:9200"
es = Elasticsearch(ELASTIC_SERVER)

app = Flask(__name__)

# Just for GUI
@app.route("/")
def index():
    return render_template("index.html")

# Rest API Test
@app.route("/get/test", methods=["GET"])
def get_test():
    data = es.cat.indices(index="*", h="index").splitlines()

    print(">>>>> response: ", data)
    return make_response(jsonify(data))

# Rest API Test
@app.route("/post/test", methods=["POST"])
def post_test():
    data = request.json
    index_name = data['index']
    indices = es.cat.indices(index="*", h="index").splitlines()
    if index_name not in indices:
        es.indices.create(index=index_name)
        res = index_name + " created"
        return make_response(res)

    print(">>>>> POST sareta: ", data)
    res = index_name + " is already exists"
    return make_response(res)


if __name__ == "__main__":
    app.run(host="0.0.0.0", port=7776, debug=True)
これを実行してみます
python app.py
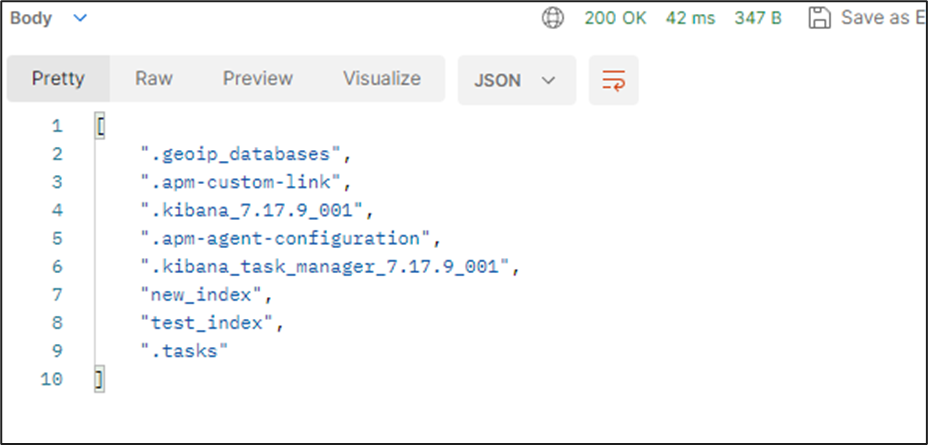
GET でインデックス一覧取得
POST でインデックス作成
new_index というインデックス名を POSTしてみます
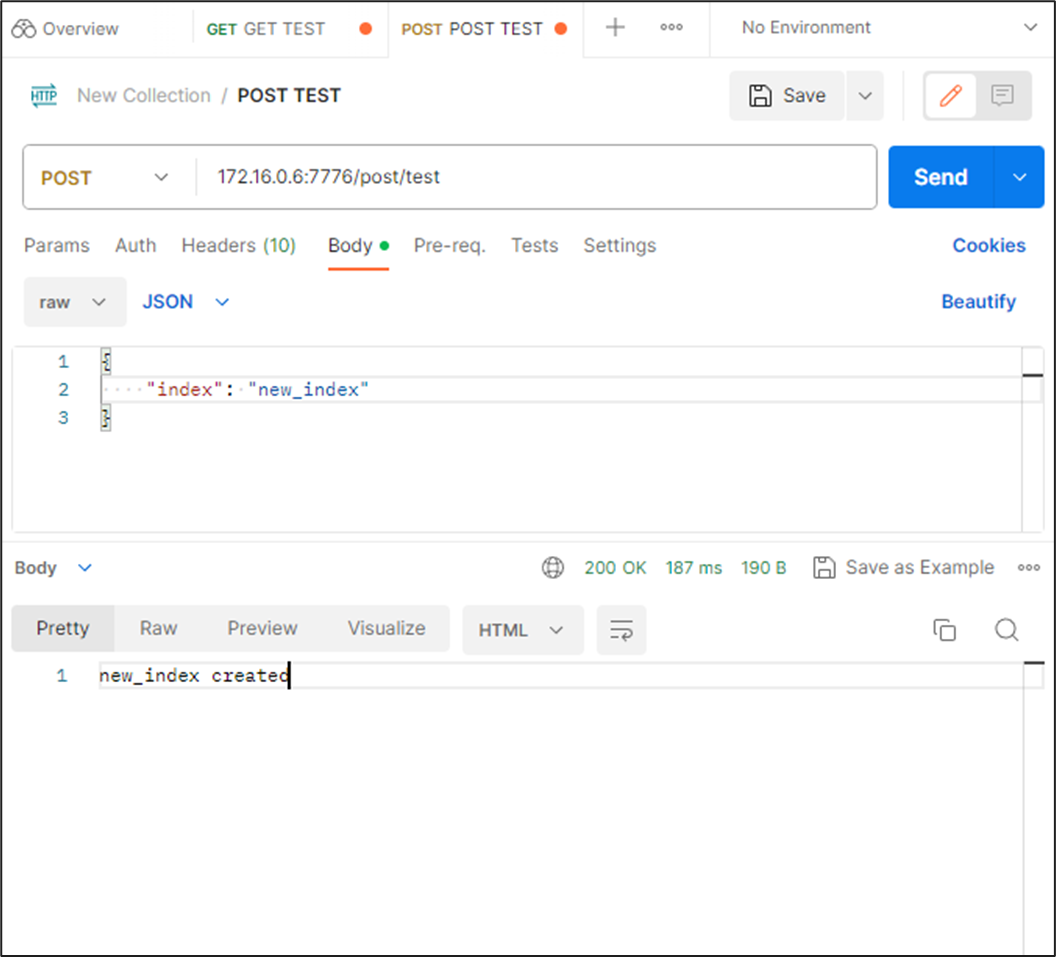
インデックス名を GET すると「new_index」というのが作られています
まとめ
ここまでで開発に使うコンテナたちのベースが作られました
・フロントエンド:Next.jsをベースに JavaScriptでGUIを作る
・バックエンド:Flaskをベースに、フロントエンドからREST APIを受けて、Nutanixクラスタ、Elasticsearchからデータ入出力を行う
・Elasticsearch:外部データベース、サーチエンジンとして利用
次回からいよいよ各ページを作っていきます
まずは入口のページからです
【Nutanix ログほいほい】フロントエンドのベースコンテナ作る
今回から Github でコードを公開していきます
Githubリポジトリ
このブログ用リポジトリはここに公開していきます
https://github.com/konchangakita/blog-loghoi.git
開発用サーバで、git cloneすると良いです
% git clone https://github.com/konchangakita/blog-loghoi.git
Cloning into 'blog-loghoi'...
remote: Enumerating objects: 4, done.
remote: Counting objects: 100% (4/4), done.
remote: Compressing objects: 100% (3/3), done.
remote: Total 4 (delta 0), reused 0 (delta 0), pack-reused 0
Receiving objects: 100% (4/4), done.
コンテナの構造
全体像はこんな感じで、今回はフロントエンドのベースとなるコンテナを作ります

フロントエンドコンテナのベース
フロントエンドは Next.js をベースに作っていきます
Next.js のコンテナ化について下記にも記載があったのですが
next.js/examples/with-docker at canary · vercel/next.js · GitHub
最終的に完成したコンテナに使うのはよさそうですが、初心者がガリガリ検証しながら使う感じではなさそう、、、
ということで、dockerhub の nodeイメージをベースにイチから作ってゆきます
コンテナ作成
はじめは空っぽのコンテナを作って、
FROM node:20-slim

WORKDIR /usr/src/

CMD ["tail", "-f", "/dev/null"]
Next.jsのインストール
まずはコンテナを起動して、Next.jsのインストールを行います
# npx create-next-app@latest
|<

今では標準で <strong class="st">Type Script</strong> が選択できようになっているようですね
オプションはデフォルトのままインストール
[f:id:konchangakita:20230814013118p:plain]

インストールしたフォルダに移動して、とりあえず実行してみます
>|sh|
# npm run dev
一発目の起動ではなんだかこんなエラーが出ましたが、、、しばらくしたらなんだかちょっと待ったらいけました
- error Error [SyntaxError]: Unexpected end of JSON input
    at JSON.parse (<anonymous>)
    at loadManifest (/usr/src/next-app/loghoi/node_modules/next/dist/server/load-manifest.js:30:27)
    at DevServer.getNextFontManifest (/usr/src/next-app/loghoi/node_modules/next/dist/server/next-server.js:469:47)
    at DevServer.findPageComponents (/usr/src/next-app/loghoi/node_modules/next/dist/server/dev/next-dev-server.js:557:43)
    at process.processTicksAndRejections (node:internal/process/task_queues:95:5)
    at async DevServer.renderPageComponent (/usr/src/next-app/loghoi/node_modules/next/dist/server/base-server.js:1430:24)
    at async DevServer.renderToResponseImpl (/usr/src/next-app/loghoi/node_modules/next/dist/server/base-server.js:1486:32)
    at async DevServer.pipeImpl (/usr/src/next-app/loghoi/node_modules/next/dist/server/base-server.js:727:25)
    at async DevServer.handleCatchallRenderRequest (/usr/src/next-app/loghoi/node_modules/next/dist/server/next-server.js:698:13)
    at async DevServer.handleRequestImpl (/usr/src/next-app/loghoi/node_modules/next/dist/server/base-server.js:639:17) {
  digest: undefined
}
最終的に compiled successfully とか出たらとりあえずOK
- ready started server on 0.0.0.0:7777, url: http://localhost:7777
- event compiled client and server successfully in 206 ms (20 modules)
- wait compiling...
- event compiled client and server successfully in 177 ms (20 modules)
- wait compiling /page (client and server)...
- event compiled client and server successfully in 1924 ms (415 modules)
- wait compiling...
- event compiled successfully in 260 ms (235 modules)
- wait compiling /favicon.ico/route (client and server)...
- event compiled successfully in 154 ms (249 modules)
ブラウザから接続するポートを変えたい場合は、package.jsonの "dev": "next dev" の行をいじります
  "scripts": {
    "dev": "next dev -p 7777",
    "build": "next build",
    "start": "next start",
    "lint": "next lint"
  },
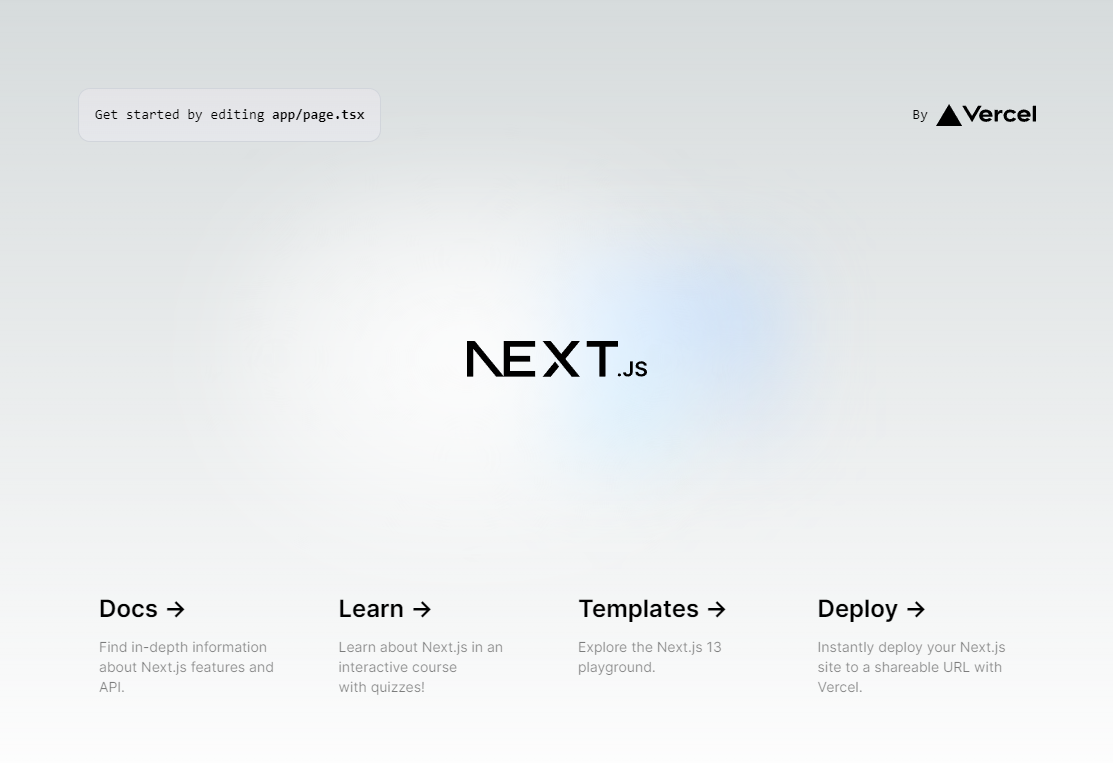
とりあえずブラウザからアクセスして、これが出てこればあっている
その他機能のインストール
あとは DaisyUI、Fontawesomeなど、過去の自分のブログを参考にしながら、インストールしていきます
konchangakita.hatenablog.com
コードフォーマッターも使ってみる
Prettier というコードフォーマッターも利用してみようと思います
全部では無いですが、この辺を参考にしてみました
【2022年】Next.js + TypeScript + ESLint + Prettier の構成でサクッと環境構築する
VScode側でも拡張機能をいれたり設定もする必要がありますが、初心者的にはコードがキレイになりそうなので、よさそう
色々インストールしていくと、package.jsonファイルが育っていきます
node関連は package.json があれば良いので、育ったpackage.json がある状態で dockerfile上でyarnするだけでよいのです
docker-compose で起動
最終的には Kubernetes化したいですが、開発中は何かとdocker-composeでローカルファイルシステムをマウントしてリアルタイムで直接いじれるようにしておいた方が何かと便利です
Dockerfile側は、これだけです
(開発が終わればコメントアウトをはずす予定)
FROM node:20-slim

#WORKDIR /usr/src/
#COPY ./next-app .
#RUN yarn
#RUN npm build
#CMD ["npm", "start"]
docker-compose側でローカルファイルシステムをマウントしてやることで、リアルタイムにファイルを編集しつつ確認するのが楽なので、開発中はこのカタチをとります
(きっとCI/CD組めば、ファイルの書き換えしたらコンテナイメージ自動的に更新とかできるんだろうな)
version: "3.8"
services:
  frontend:
    build:
      context: ./frontend
      dockerfile: dockerfile
    container_name: loghoi-frontend
    ports:
      - 7777:7777
    volumes:
      - ./frontend/next-app:/usr/src/next-app:z
    command:
      bash -c "cd /usr/src/next-app/loghoi
      && yarn
      && tail -f /dev/null"
    working_dir: /usr/src/next-app/loghoi
    networks:
      - local

networks:
  local:
    driver: bridge
今日の成果物
長々と書いてきましたが、最終的には github からダウンロードした docker-compose.ymlを使うだけでOKです
blog/0814 配下で
docker-composeで起動し
# docker-compose -f "docker-compose.yml" up -d --build
コンテナに入って
# docker exec -it loghoi-frontend bash
/usr/src/next-app/loghoi配下で Next.js Webサーバ起動
# npm run dev
ブラウザで開発サーバの IPアドレス:7777にアクセス!

次回は
なにげにフロントエンドコンテナをイチから作り直したりしていると、何が最適なのかよくわからなくなってきたりして。。。
バックエンドもやりたかったけど、タイムアップでちょっと悩みながら次回はバックエンドコンテナのベースを作ります
【Nutanix ログほいほい】開発環境の整備(VScodeとDocker)
今回は、開発用のリモートサーバをセットアップして、ローカルPCからどうやって開発やってくかの基礎部分を整備していきます
インストール・設定するもの
ローカルPCの設定
何は最近はこれさえいれときゃオッケー的な VScodeでいきます
【おてがる開発環境をつくろう】さいきょうのえでぃた VS Code - konchangakita
拡張機能はこのあたりをいれておくと良いでしょう
【おてがる開発環境をつくろう】VS Code あれもこれもエクステンション - konchangakita
今回は Remote Development を使っていきます

Postmanは一旦インストールのみくらいでOK
リモートサーバのセットアップ
OSはUbuntu 22.04でデフォルトのままインストール
open ssh インストール
$ sudo apt update
$ sudo apt install openssh-server
状況確認
$ sudo systemctl status ssh
● ssh.service - OpenBSD Secure Shell server
     Loaded: loaded (/lib/systemd/system/ssh.service; enabled; vendor preset: enabled)
     Active: active (running) since Sun 2023-08-06 20:10:49 JST; 1min 47s ago
~~~~~~~~~~~~~(以下略)
ローカル VScode での ssh接続設定
Remote Development の Remote SSH 機能を使って接続する設定します

ssh 接続するサーバ情報を入力

コンフィグファイルの設定内容

新しく出てきたサーバ名から新規ウィンドウで開く

新しいウィンドウが立ち上がりパスワード入力

これであとは、リモートサーバでテキスト操作が簡単になります
ついでに鍵認証
ローカルのPC上で鍵を作っておき、開発サーバ側に公開鍵を設置
~$ mkdir .ssh
~$ chmod 700 .ssh
~$ cd .ssh
~/.ssh$ touch authorized_keys
~/.ssh$ chmod 600 authorized_keys
authorized_keys へ公開鍵の内容をコピペ
ローカルの VScode の Remote SSSコンフィグファイルに、秘密鍵の場所を追記(最後の行)
Host 172.16.0.6
    HostName loghoi
    User nutanix
    IdentityFile C:\Users\xxx\.ssh\id_rsa
Dockerのセットアップ
ここからは VScode のリモート接続したところから操作できます
sudo無しでの Docker操作
docker グループの状況確認
$ getent group docker
docker:x:136:
ユーザーを追加してリブート
$ sudo gpasswd -a nutanix docker
$ getent group docker
docker:x:136:nutanix
$ sudo reboot
sudoなしができるか確認
$ docker ps
CONTAINER ID   IMAGE     COMMAND   CREATED   STATUS    PORTS     NAMES
サンプルを起動
$ docker run hello-world
Unable to find image 'hello-world:latest' locally
latest: Pulling from library/hello-world
719385e32844: Pull complete
Digest: sha256:926fac19d22aa2d60f1a276b66a20eb765fbeea2db5dbdaafeb456ad8ce81598
Status: Downloaded newer image for hello-world:latest

Hello from Docker!
This message shows that your installation appears to be working correctly.
(以下略)
状態確認
$ docker images
REPOSITORY    TAG       IMAGE ID       CREATED        SIZE
hello-world   latest    9c7a54a9a43c   3 months ago   13.3kB
nutanix@loghoi:~$ docker ps -a
CONTAINER ID   IMAGE         COMMAND    CREATED         STATUS                     PORTS     NAMES
8ac88766360b   hello-world   "/hello"   2 minutes ago   Exited (0) 2 minutes ago             hungry_snyder
リモートサーバでもVScodeの拡張機能をインストールしておくと何かと便利

コンテナやイメージの削除もGUIからできる

なんか忘れてるような気もしてるけど、一旦はここまで
次回は、フロントエンドコンテナとバックエンドコンテナを作っていきます
【Nutanix ログほいほい】の画面設計、開発計画する
まずは完成予想図を描いていきます
開発素人なので、分かりやすいところから攻めます
全体のイメージと画面遷移を考える
ざっくり5つの画面から構成することにします
とりあえず、シンプルに必要最低限のページだけ考えてみます
まずはNutanixクラスタの情報登録するページをはじめにもってきて、その後にそれぞれの機能別のページ遷移するためのゲートウェイ的なページを用意します
その後に各ページに必要な設定(?)などを入力しつつ、ページ遷移する、そんなイメージです

プログラムしてみるには、まだ想像ができません
素人なので、中身をイメージを作るべく実際の開発プラットフォームから想像します
どんな風に作ってゆく?
ここは過去の知ってる範囲の知識を総動員して、Docker + Next.js + Elasticsearch でチャンレンジです
- Docker:どこでも持っていけるように、使ってもらえるようにコンテナ化し、クラウドネイティブアプリケーションとして作ります!
- Next.js:Reactフレームワークでは、これがまだ一番使われてそうなので、今回もこれでいきます
- Elasticsearch:データベースはさっぱり分からないので、GUIでも操作が簡単、コンテナ化の経験もあるのでやはりこれで
というわけで、開発環境のイメージはこんな感じです

最終的にはKubernetes化も視野にいれて作り込みたいですが、そこまでたどり着けるか、、、、
次回は、開発用サーバの構築を
【Nutanix ログほいほい】を作る
しばらくブログの更新止まっていましたが、今年も開発チャレンジの季節がやってきました
こんどは何をつくる?
Nutanix で検証・構築・運用してみてこんなことに遭遇したことないでしょうか?
Nutanix の何か挙動がおかしい・アラートが出てるけど、ログ取得ってどこからやるんだっけ?
ログ取得してみたものの、コンソールから手元に持ってくるのメンドクサイ、、、え、さっきのログよりまた最新のログが必要。。。。?
などなど、Nutanix は仮想環境運用の手間がぐいっと減らせますが、もちろん状況によりけりでトラブルシューティングのためにはログを見るシチュがちょいちょいあります
そんなお悩みを手助けできる「Nutanix ログほいほい」を作ってみたいと思います
ログほいほいの中身
大きく3つにわけて作っていこうと思います
・リアルタイムログビューワー
・シスログビューワー
・スタンダードログコレクター
リアルタイムログビューワー
CVM内の ~data/logs配下にあるログを tail -f するイメージ

見たいログを選んで、リアルタイム表示しワードを入れてフィルタするような機能
何か操作して、「今」何かログが出力されていないか確認したい
その為だけにCVMに ssh して、いっぱいあるログから選んでtail -fするのメンドウという思いから
ログコレクター
CVMでコマンド実行し、まとめてダウンロード、GUI上でも中身を表示

慣れてない環境でCVMにログインがメンドウ、出力された実行結果のダウンロードもメンドウ、1クリックでなんとか出来ないかという思いから
